SVG package v2.20 update 13 for Delphi Rio

In update 13 of the SVG control package, functionality is added to support DPI aware applications.

Scaling, without loss of quality, is of course one of the major benefits of SVG graphics, so they lend themselves well for this kind of application


Delphi VCL

The VCL controls in the SVG Package: TSVG2Control, TSVG2Image and TSVG2LinkedImage will now scale the containing SVG graphic if your application is DPI aware en the DPI settings change.

Here is a bit of technical background how scaling in TSVG2Control is implemented, this is more or less the same for TSVGImage and TSVGLinkedImage:

  • A “Scale” property is added to the control
  • The “ChangeScale” method from TControl is overridden and will set a new value for “Scale”
  • Following a change in size of the control, the embedded “render context” of the control is also resized (this was already the case in previous versions).
  • If the SVG renderer draws on the render context, the coordinates are multiplied by “Scale”
  • If the SVG renderer needs to find the element on a particular coordinate of the render context, the coordinates are divided by “Scale”


What about the SVG image list?

The TSVG2ImageList, TSVG2LinkedImageList and TSVG2Graphic are not derived from TControl but are just components. These have no parent control and will not scale automatically when DPI settings change (this is the same as with Delphi’s standard TImageList).

To respond to DPI changes, you could write a procedure that updates the size of the images in the SVG image list when this is required. This is something you would have to put into your application yourself, since I can’t implement it in the TSVG2ImageList component.

This procedure could look like this:

procedure TForm1.ImageListScale(aImageList: TSVG2ImageList; M, D: Integer);
begin
  if M <> D then
  begin
    aImageList.BeginUpdate;
    try
      aImageList.Width := MulDiv(aImageList.Width, M, D);
      aImageList.Height := MulDiv(aImageList.Height, M, D);
    finally
      aImageList.EndUpdate
    end;
  end;
end;

This procedure must be called, one time when the application starts…

procedure TForm1.FormCreate(Sender: TObject);
begin
  ImageListScale(SVG2ImageList1, CurrentPPI, GetDesignDPI);
end;

… and every time the monitor dpi setting changes.

procedure TForm1.FormBeforeMonitorDpiChanged(Sender: TObject; OldDPI, NewDPI: Integer);
begin
  ImageListScale(SVG2ImageList1, NewDPI, OldDPI);
end;

If you do this with a normal TImageList, the bitmaps will be stretched, witch degrades the quality of the image. The difference with the SVG image list is that a change in bitmap size will trigger a re-render of the image, which will keep the quality unchanged.

There is of course a performance penalty for the re-render, this will depend on the amount of images in the image list and the complexity of the svg graphics.

An alternative solution is to use multiple image lists with pre-rendered images and then switch between these image lists by updating the image list property of the linked controls.

I updated the VCL version of the SVG viewer demo application so it is DPI aware. So the images in the SVG image list and any SVG graphics that are loaded or added will be scaled according to the monitor settings.


Delphi FMX

The controls in FMX already support scaling, so no extra functionality is added to the FMX SVG controls to support DPI awareness.

The image list in FMX also supports scaling, it isn’t based on fixed sized bitmaps as in VCL but allows for different sized bitmaps, here also nothing had to be changed.

So on the control/component level, there seems to be nothing extra that has to be done.

The only thing we can do, is just check how the application behaves if we declare it DPI aware.

So I checked the “Per Monitor V2” setting in the manifest of the FMX viewer application and gave it a run.

What didn’t work:

  • Any controls that have the “ControlType” property on “Platform” won’t scale right, these I had to change to “Styled”
  • The application did not respond to change in monitor DPI settings while running.

What did work:

  • Starting the application, after changing the monitor scale settings, seems to work o.k.

(Image is from OpenClipart.org “blue-butterfly”)


Conclusion

  • The VCL components in the SVG control package will scale automatically in response to any scaling of there parent control
  • The VCL components, TSVG2ImageList, TSVG2LinkedImageList, TSVG2Graphic will not scale automatically, you have to deal with that in your application.
  • The FMX controls in the SVG control package already support scaling, but although you can declare an FMX application DPI aware, it seems that change in DPI settings while running is not yet supported.

Apart from these changes in update 13, a number of bugs are fixed and the performance for SVG mouse events is much improved, see the change log for a full list.


v2.20 update 11

Here are a couple of things that are new or improved in update 11. For a full list, see the change log.

Added “AspectRatioAlign” and “AspectRatioMeetOrSlice” to SVG controls

It was already possible to automatically add a viebox to SVG graphics that don’t have one defined with the property “AutoViewbox”.

I have now added the properties “AspectRatioAlign” and “AspectRatioMeetOrSlice”. These properties give you further control how the SVG graphic is aligned within the control bounds.

Below you see the effect of setting the “AutoViewbox” property.

If “AutoViewbox” = FALSE, the SVG graphic will be rendered exactly as defined in the SVG graphic itself, if it is bigger than the SVG control, it will be clipped.

If “AutoViewbox” = TRUE, the SVG graphic will be aligned within the control according to the “AspectRatioAlign’ and “AsectRatioMeetOrSlice” settings, the default setting is “xMid yMid Meet”.


Here you see different settings for “AspectRatioAlign” and “AspectRatioMeetOrSlice”, these are equivalent to the settings of the SVG “preserveAspectRatio” attribute.


Improved rendering quality for rotated SVG graphics

On FMX you can rotate and scale controls. The SVG renderer in update 11 contains a new algorithm for calculating internal bitmap buffers, for things like filters and masks. This gives much better results for transformed controls.

Below you see de difference between the graphic rendered with update 10 left, and update 11 right.

This also works on VCL, although in Delphi, you don’t have properties on the VCL controls to scale or rotate, you might have SVG graphics that have a transformation defined on the outer SVG element.


Support for “fill-rule” and “clip-rule” attributes

These attributes give you control over how an path element is filled.

This attribute is not supported for all platforms, see table below.

SVG Render context VCL FMX
Direct2D Yes n.a.
GDI+ No n.a.
Aggpas Yes Yes
FMX canvas n.a. No

The standard SVG render context for VCL is “Direct2D”, for FMX the standard is “FMX canvas”. You can overrule the stanard render context in the SVG control package by setting compiler directives in the “CompilerSettings.inc” file.


Improved parsing speed for pathdata

For testing the parsing speed I use an SVG graphic with a very large amount of path elements: the Rose-Breasted-Groesbeck.svg. This SVG graphic has 36832 path elements.

Update 10 Update 11
Parsing time in ms 8703 5766


Version 2.2 of SVG control package released

The SVG control package offers a set of controls and tools to use Scalable Vector Graphics (SVG) in your Delphi projects.

It is a commercial package but there is also a demo package available and a number of demo applications.

There are many improvements made in rendering quality and speed, also new features are added:

The image shows examples of SVG filters. The SVG graphic was made with Inkscape using the filter templates “Enamel Jewelry”, “Pressed Steel” and “Rough and Dilate” on the upper image. This was then rendered with the SVG control package on a VCL form. The filters in the package are all hand coded.

Inkscape has many wonderful filter templates to experiment with. These will often need quite a lot of resources to render, because SVG filters operate on pixel level.

With SVG pointer events you can build interactivity in SVG graphics, these will then be available in your Delphi application. An example of this is the “About” form in de demo viewer application, which is just a TSVG2Image control, but with pointer events build in for the “W3C SVG” link and the “www.bverhue.nl/delphisvg/” link.

The VCL demo viewer is also upgraded. SVG content can be copied and pasted using the clipboard and selections of rendered images can be exported as png files.

Source code of the demo applications is also included in the package.

Save bitmap with transparency as .png in VCL

Here is an example how to save a bitmap containing an alpha channel as a .png image using Delphi VCL.

In Delphi VCL you can use the TPngImage component to work with .png images. The only problem is that if you assign a bitmap to a TPngImage using PngImage.Assign(Bitmap) the alpha channel is lost.

I found the following solution thanks to this discussion on a German forum. So in stead of assigning the bitmap to the TPngImage object, you create a new blank TPngImage with alpha channel enabled and draw the bitmap on the TPngImage canvas.

After that you copy the alpha channel of the bitmap to the TPngImage in a separate step.

So in this example I render an SVG image to a bitmap and save the bitmap as a .png image (thanks to Thomas Wassermann).

[code language=”Delphi”]
unit Unit1;

interface

uses
  Winapi.Windows, Winapi.Messages, System.SysUtils, System.Variants, System.Classes, Vcl.Graphics,
  Vcl.Controls, Vcl.Forms, Vcl.Dialogs, Vcl.StdCtrls;

type
  TForm1 = class(TForm)
    Button1: TButton;
    OpenDialog1: TOpenDialog;
    procedure Button1Click(Sender: TObject);
  private
    { Private declarations }
  public
    { Public declarations }
  end;

var
  Form1: TForm1;

implementation
uses
  BVE.SVG2SaxParser,
  BVE.SVG2Intf,
  BVE.SVG2Types,
  BVE.SVG2ELements.VCL,
  Vcl.Imaging.pngimage;

{$R *.dfm}

// Source: http://www.entwickler-ecke.de/topic_Bitmap+pf32bit+mit+Alpha+afPremultipied+zu+PNG+speichern_103159,0.html

type
  TRGB = packed record B, G, R: byte end;
  TRGBA = packed record B, G, R, A: byte end;
  TRGBAArray = array[0..0] of TRGBA;

function PNG4TransparentBitMap(aBitmap:TBitmap): TPNGImage;
var
  X, Y: integer;
  BmpRGBA: ^TRGBAArray;
  PngRGB: ^TRGB;
begin
  //201011 Thomas Wassermann

  Result := TPNGImage.CreateBlank(COLOR_RGBALPHA, 8, aBitmap.Width , aBitmap.Height);

  Result.CreateAlpha;
  Result.Canvas.CopyMode:= cmSrcCopy;
  Result.Canvas.Draw(0, 0, aBitmap);

  for Y := 0 to Pred(aBitmap.Height) do
  begin
    BmpRGBA := aBitmap.ScanLine[Y];
    PngRGB:= Result.Scanline[Y];

    for X := 0 to Pred(aBitmap.width) do
    begin
      Result.AlphaScanline[Y][X] :=  BmpRGBA[X].A;
      if aBitmap.AlphaFormat in [afDefined, afPremultiplied] then
      begin
        if BmpRGBA[X].A <> 0 then
        begin
          PngRGB^.B := Round(BmpRGBA[X].B / BmpRGBA[X].A * 255);
          PngRGB^.R := Round(BmpRGBA[X].R / BmpRGBA[X].A * 255);
          PngRGB^.G := Round(BmpRGBA[X].G / BmpRGBA[X].A * 255);
        end else begin
          PngRGB^.B := Round(BmpRGBA[X].B * 255);
          PngRGB^.R := Round(BmpRGBA[X].R * 255);
          PngRGB^.G := Round(BmpRGBA[X].G * 255);
        end;
      end;
      Inc(PngRGB);
    end;
  end;
end;

procedure TForm1.Button1Click(Sender: TObject);
var
  FileName: string;
  SVGParser: TSVGSaxParser;
  SVGRoot: ISVGRoot;
  Bitmap: TBitmap;
  Png : TPngImage;
begin
  if OpenDialog1.Execute then
  begin
    FileName := OpenDialog1.FileName;

    // Create a root to store the SVG rendering tree

    SVGRoot := TSVGRootVCL.Create;

    // Create a SAX parser instance

    SVGParser := TSVGSaxParser.Create(nil);
    try

      // Parse SVG document and build the rendering tree

      SVGParser.Parse(”, FileName, SVGRoot);

      // Create a bitmap

      Bitmap := TBitmap.Create;
      try
        Bitmap.PixelFormat := TPixelFormat.pf32bit;   // 32bit bitmap
        Bitmap.AlphaFormat := TAlphaFormat.afDefined; // Enable alpha channel

        Bitmap.SetSize(480, 320);            // Set desired size
        Bitmap.Canvas.Brush.Color := clNone; // Fill background with transparent
        Bitmap.Canvas.FillRect(Rect(0, 0, 480, 320));

        // Render the SVG onto the bitmap

        SVGRenderToBitmap(
          SVGRoot, // The root containing the rendering tree
          Bitmap   // The destination bitmap
          );

        // Create the png component

        Png := PNG4TransparentBitMap(Bitmap);
        try
          FileName := ChangeFileExt(FileName, ‘.png’);
          Png.SaveToFile(FileName);
        finally
          Png.Free;
        end;

      finally
        Bitmap.Free;
      end;

    finally
      SVGParser.Free;
    end;
  end;
end;

end.

[/code]


Random SVG star

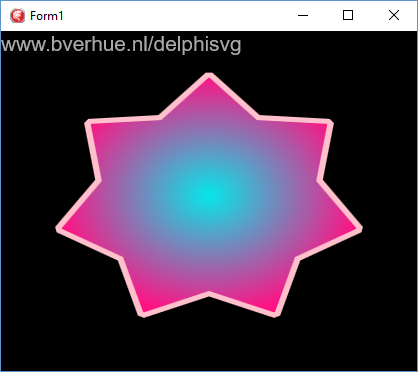
Here is small application that morphs between star shapes.

The VCL project looks like this: The form color is set to “black” and it contains an TSVG2Image aligned “alClient” and a TTimer.

Also, the “DoubleBuffered” property of the form is set to “True”, otherwise we’ll end up with a lot of unwanted flicker.

RandomStar1

Then the following code in the unit:

[code language="Delphi"]

unit Unit1;

// -----------------------------------------------------------------------------
//
// Random SVG star
//
// B.J.H. Verhue
//
// -----------------------------------------------------------------------------

interface

uses
  Winapi.Windows, Winapi.Messages, System.SysUtils, System.Variants,
  System.Classes, Vcl.Graphics, Vcl.Controls, Vcl.Forms, Vcl.Dialogs,
  Vcl.ExtCtrls,
  BVE.SVG2Image.VCL;

type
  TForm1 = class(TForm)
    SVG2Image1: TSVG2Image;
    Timer1: TTimer;
    procedure Timer1Timer(Sender: TObject);
    procedure SVG2Image1Click(Sender: TObject);
  private
    FTime: integer;
    function LFO(const f: single): single;
    function LFO2(const s, f: single): single;
  public
    function StarPath(const aEdgeCount: integer; const aRIn, aROut, aOuterEdge: single): string;
    procedure Update;
  end;

var
  Form1: TForm1;

implementation
uses
  Vcl.Clipbrd,
  System.Math;

{$R *.dfm}

{ TForm1 }

function TForm1.LFO(const f: single): single;
begin
  // Low frequency oscilator

  Result := Sin(2* PI * f * FTime / 1000);
end;

function TForm1.LFO2(const s, f: single): single;
begin
  // Coupled LFO's to simulate randomness

  Result := LFO(s * LFO(f));
end;

function SVGColor(const aR, aG, aB: single): string;
begin
  Result := '#'
     + IntToHex(Round(255 * Abs(aR)), 2)
     + IntToHex(Round(255 * Abs(aG)), 2)
     + IntToHex(Round(255 * Abs(aB)), 2);
end;

function TForm1.StarPath(const aEdgeCount: integer; const aRIn, aROut,
  aOuterEdge: single): string;
var
  i: integer;
  InnerAngle, OuterAngle, X, Y: single;
begin
  // Create starshaped pathdata
  // aEdgeCount : number of edges or points
  // aRIn       : radius of star core
  // aROuter    : outer radius of star
  // aOuterEdge : width of star point

  Result := '';

  InnerAngle := 2 * PI / aEdgeCount;
  OuterAngle := arctan2(aOuterEdge, aROut);

  for i := 0 to aEdgeCount - 1 do
  begin
    X := aRIn * Sin(i * InnerAngle);
    Y := aRIn * Cos(i * InnerAngle);

    if i = 0 then
      Result := Result + Format('M%0:.2f,%1:.2f', [X, Y])
    else
      Result := Result + Format('L%0:.2f,%1:.2f', [X, Y]);

    X := aROut * Sin((i + 0.5 - OuterAngle) * InnerAngle);
    Y := aROut * Cos((i + 0.5 - OuterAngle) * InnerAngle);
    Result := Result + Format('L%0:.2f,%1:.2f', [X, Y]);

    X := aROut * Sin((i + 0.5 + OuterAngle) * InnerAngle);
    Y := aROut * Cos((i + 0.5 + OuterAngle) * InnerAngle);
    Result := Result + Format('L%0:.2f,%1:.2f', [X, Y]);

  end;
  Result := Result + 'Z"/&amp;gt;';
end;

procedure TForm1.SVG2Image1Click(Sender: TObject);
begin
  Timer1.Enabled := not Timer1.Enabled;

  // Put SVG on clipboard if paused

  if not Timer1.Enabled then
    Clipboard.AsText := SVG2Image1.SVG.Text;
end;

procedure TForm1.Timer1Timer(Sender: TObject);
begin
  // Timer interval is set to 25ms, FPS=40

  Update;
  Inc(FTime, Timer1.Interval);
end;

procedure TForm1.Update;
begin
  // Create SVG content and assign to SVG2Image

  SVG2Image1.SVG.Text :=
      '&amp;lt;svg version="1.1" id="star"' + ' viewBox="-100 -100 200 200"' + ' xmlns="http://www.w3.org/2000/svg"&amp;gt;'

  // Defs section with a random radial gradient

    + ' &amp;lt;defs&amp;gt;'
      + ' &amp;lt;radialGradient id="radGrad1"&amp;gt;'
      + ' &amp;lt;stop offset="0%" stop-color="' + SVGColor(LFO2(0.01, 0.02), LFO2(0.015, 0.03), LFO2(0.008, 0.015)) + '" /&amp;gt;'
      + ' &amp;lt;stop offset="100%" stop-color="' + SVGColor(LFO2(0.02, 0.01), LFO2(0.025, 0.015), LFO2(0.03, 0.008)) + '" /&amp;gt;'
      + ' &amp;lt;/radialGradient&amp;gt;'
    + '&amp;lt;/defs&amp;gt;'

  // Path element with random starshape

    + '&amp;lt;path stroke="pink" fill="url(#radGrad1)" stroke-width="3" d="' + StarPath( Round(19 + 16 * LFO2(0.01, 0.01)), 50 + 30 * LFO2(0.03, 0.005), 80 + 10 * LFO2(0.008, 0.01), 16 + 16 * LFO2(0.01, 0.002)) + '"/&amp;gt;'

    + '&amp;lt;/svg&amp;gt;';

  SVG2Image1.Repaint;
end;

initialization
  // Set decimal seperator for "Format" function
  FormatSettings.DecimalSeparator := '.';

end.
[/code]

Sources can be found on github. To compile the examples, you need the demo or the full version of the SVG control package.

Enable transparency with TSVG2ImageList on VCL

There was a little bug in the package which prevented the proper rendering of images with transparency on the VCL TButton, so I uploaded a new fix which corrects this. After download of the fixed package you should rebuild the packages. The demo packages are update also.

In this post I would like to show how you can set properties on the TSVG2ImageList to enable transparency.

First there is the question what type of button you should select from the Tool Palette in the Delphi IDE. There is a TButton, a TBitBtn and a TSpeedButton.

It turns out that the TBitBtn and TSpeedButton are legacy controls and you should avoid using these in new applications. The illustration below shows why:

TSVG2ImageList1

There is  a Fuchsia color border on the TBitBtn and TSpeedButton control, that is because it uses the old windows method of simulating transparency by using the left (or right, not sure) bottom pixel as a transparency color. Before it copies the image from the image list, it clears the target area with color Fuchsia. On the pixels that should be semi transparent this Fuchsia color seeps through.

So TBitBtn and TSpeedButton should be avoided, the TButton, shows the correct image.

In this test application linked the image list to the ActionManager1 and added a couple of actions. On each action I set the ImageIndex of the corresponding image in the SVG2ImageList. Next linked one of the Actions to TButton.

On the TButton you also have to set the “Images” property to link to an image list. Then you have the option to set a number of image index properties on the TButton to show different images depending on the state of the button.

Finally here are the properties of the TSVG2ImageList to enable transparency:

TSVG2ImageList2

All color settings, especially “BkColor” should be set to “clNone” and “ColorDepth” should be set to “cd32Bit”.